Honda Pilot Tire Pressure Guide (All Model Years)
Unlike a lot of specs on the Pilot, tire pressure isn’t a single number you can memorize once and forget.
It’s changed across all four generations, and for a long stretch — 2012 through 2022 — it even depended on which wheel size came on your specific trim.
Get it wrong, and you’re not just risking a TPMS light: you’re giving up grip, fuel economy, and tire life on a vehicle that’s often loaded with a full third row, cargo, or a trailer.
This guide lays out the correct front and rear pressure for every Pilot from 2003 to 2026, explains why the number moves around so much, and covers what changes when you’re hauling a full load instead of just commuting solo.
Why the Pressure Isn’t the Same Every Year
Two things drive the changes in the table below:
- Generation changes. Each redesign brought a different suspension tune, curb weight, and load rating, and Honda recalibrated tire pressure to match.
- Wheel size within a generation. From 2012 onward, Pilot trims were offered with more than one wheel diameter (17″/18″ in some years, 18″/20″ in others), and a larger wheel with a shorter sidewall generally requires a different pressure than a smaller one on the same vehicle.
That second point is the one people miss most often — two Pilots of the identical model year can have different correct pressures depending on trim and wheel package.
Recommended Tire Pressure by Model Year
| Model Year | Tire Pressure (Front/Rear) |
|---|---|
| 2026 | 35/35 psi |
| 2025 | 35/35 psi |
| 2024 | 35/35 psi |
| 2023 | 35/35 psi |
| 2022 | 18″ wheel: 32/32 psi 20″ wheel: 35/35 psi |
| 2021 | 18″ wheel: 32/32 psi 20″ wheel: 35/35 psi |
| 2020 | 18″ wheel: 32/32 psi 20″ wheel: 35/35 psi |
| 2019 | 18″ wheel: 32/32 psi 20″ wheel: 35/35 psi |
| 2018 | 18″ wheel: 32/32 psi 20″ wheel: 35/35 psi |
| 2017 | 18″ wheel: 32/32 psi 20″ wheel: 35/35 psi |
| 2016 | 18″ wheel: 32/32 psi 20″ wheel: 35/35 psi |
| 2015 | 17″ wheel: 31/33 psi 18″ wheel: 35/35 psi |
| 2014 | 17″ wheel: 31/33 psi 18″ wheel: 35/35 psi |
| 2013 | 17″ wheel: 31/33 psi 18″ wheel: 35/35 psi |
| 2012 | 17″ wheel: 31/33 psi 18″ wheel: 35/35 psi |
| 2011 | 32/32 psi |
| 2010 | 32/32 psi |
| 2009 | 32/32 psi |
| 2008 | 32/32 psi |
| 2007 | 32/32 psi |
| 2006 | 32/32 psi |
| 2005 | 32/32 psi |
| 2004 | 32/32 psi |
| 2003 | 32/32 psi |
(Source: Honda Pilot Owner’s Manual)
These figures are for a normally loaded Pilot in everyday driving. If your vehicle is near its maximum weight rating — full third row, cargo, or a trailer — see the towing section below, since Honda calls for higher pressure in those situations.
The tire placard always wins. If anything here doesn’t match what’s printed on your vehicle, trust the placard — it’s specific to your exact tire size and trim, while a published table like this one has to generalize.
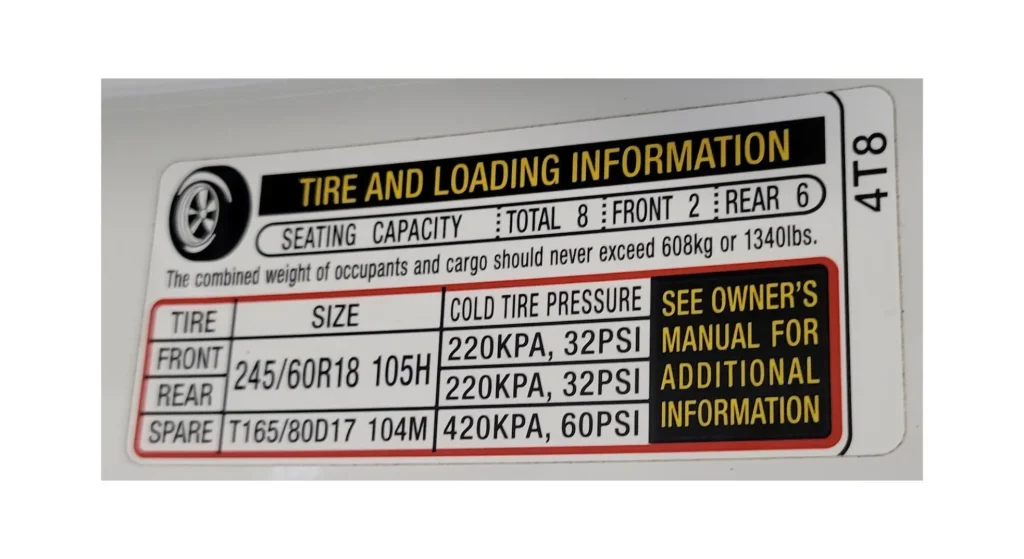
You’ll find it on the driver’s door jamb (open the door and look at the frame below the latch). Honda’s placard lists a single recommended pressure per axle for your Pilot — it’s the same figure in the table above, not a separate number for light versus heavy loads.
Tire Pressure When Towing or Carrying a Heavy Load
Honda’s published tire pressure for the Pilot is a single figure per axle — there isn’t a separate official “maximum load” number on the placard the way some trucks and vans have.
That said, a heavily loaded Pilot puts noticeably more weight on the rear tires: current Pilots are rated to tow up to 3,500 lbs with front-wheel drive, or up to 5,000 lbs with AWD and the proper towing package, on top of a full third row and cargo.
Because of that, a common practice among owners (including me) is to add a few extra psi — typically 3–5 psi over the standard figure, and never past the maximum pressure embossed on the tire’s sidewall — when towing near the rated limit or carrying a full load.
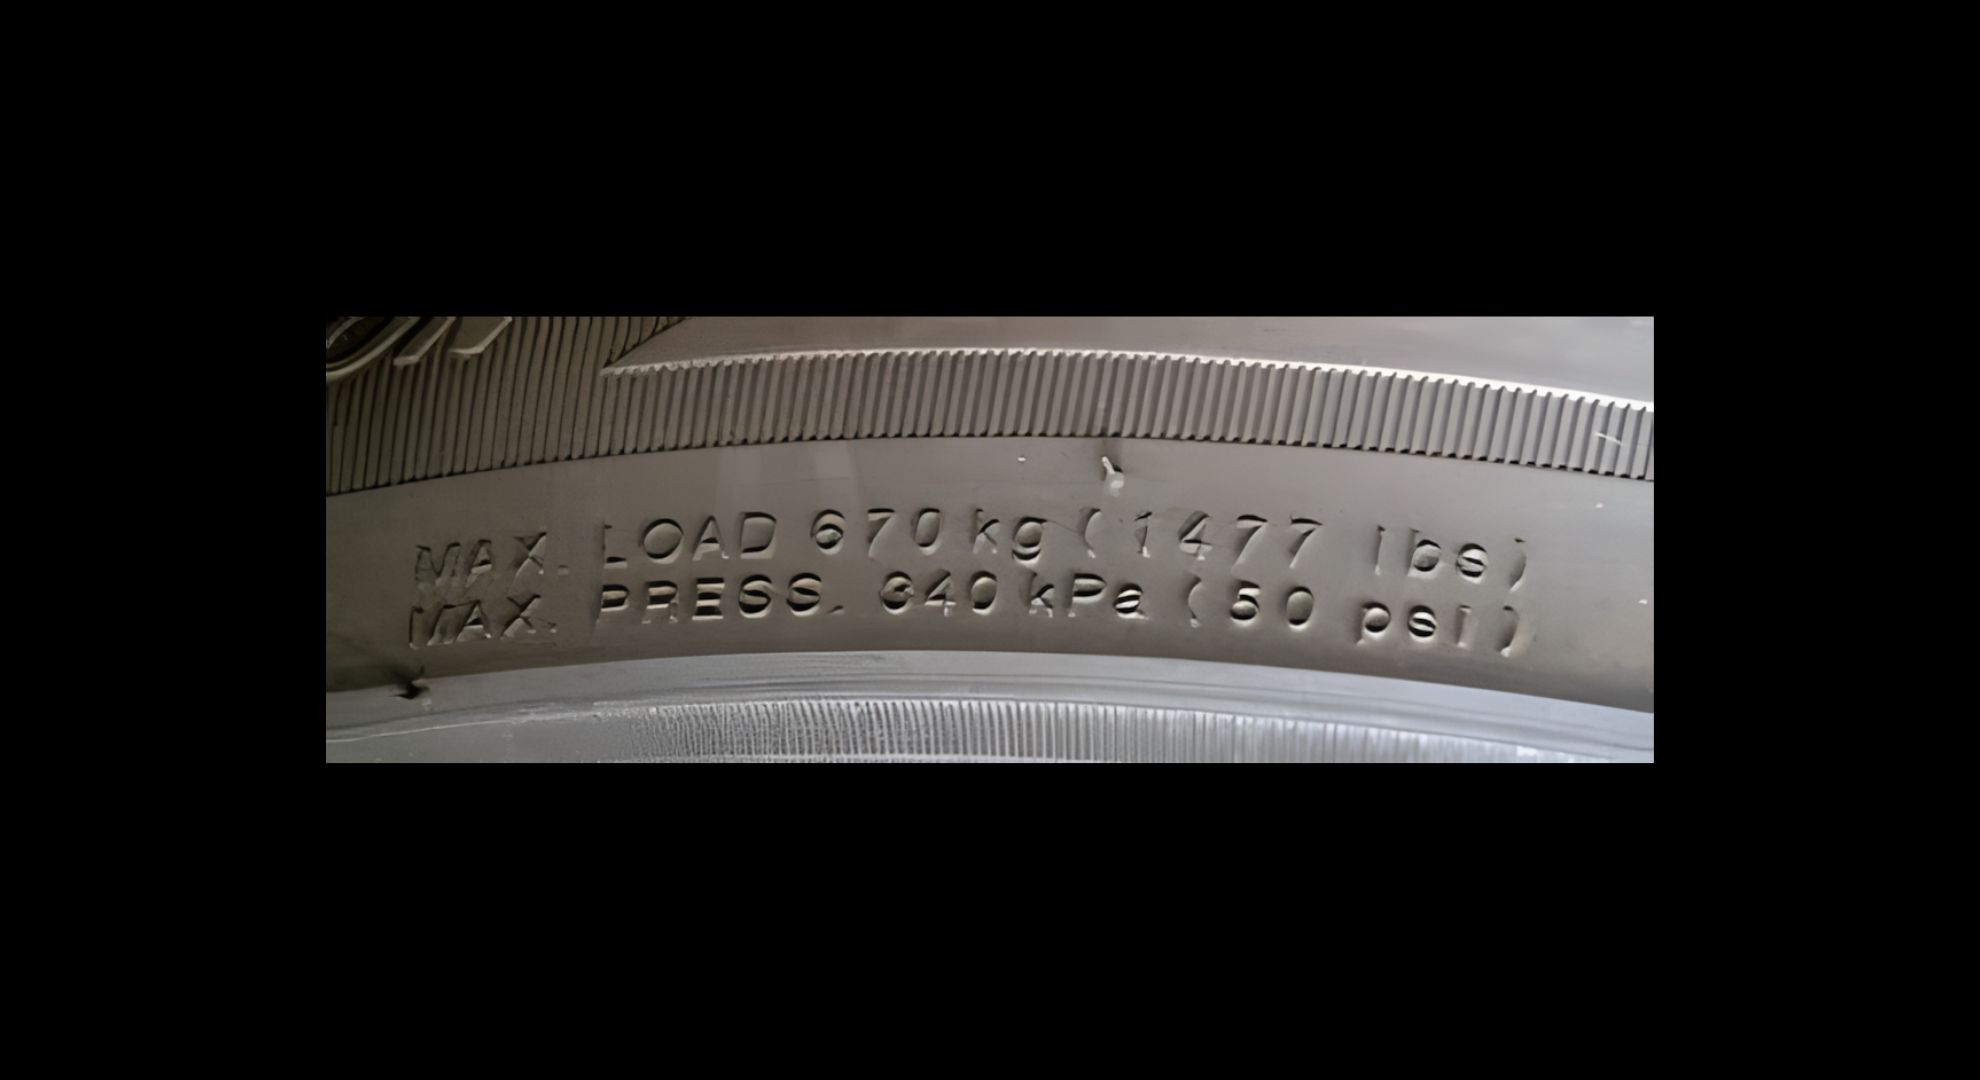
This isn’t a Honda-specified number, so treat it as a practical adjustment rather than a factory spec, and bring the pressure back down to the standard figure once the load comes off.
If you want an official number for a specific load, a tire shop or Honda dealer can calculate one based on your exact tire and load weight.
Checking and Setting Tire Pressure Correctly
You only need a tire pressure gauge, a way to add air (a portable inflator or a gas station air pump), and a couple of minutes per tire.
Do it when the tires are cold — meaning the vehicle has been sitting for at least a few hours, or hasn’t been driven more than a mile or two.
Driving heats the air inside the tire and raises the reading, so a check right after a drive will look higher than the tire actually runs at rest.
- Remove the valve cap and press the gauge firmly onto the valve stem until the hissing stops and you get a steady reading.
- Compare it to the correct number for your model year and wheel size.
- To add air, use an inflator until the gauge matches the target; to let air out, press the small pin in the center of the valve stem in short bursts, checking as you go.
- Do all four tires, plus the spare if your Pilot has a full-size one.
- Replace the valve caps — they keep out dirt and moisture that can affect the seal over time.
2023+ Models: Tire Fill Assist Does the Guesswork For You
Starting with the 2023 redesign, the Pilot added Tire Pressure Monitoring System with Tire Fill Assist, which takes the guesswork out of the process above.
Here’s how it works: with the vehicle on, pull up the tire pressure screen through the driver information display (via the steering wheel controls — press Home, then scroll to the tire pressure screen), which shows the live psi reading for each individual tire.
As you add air with an inflator, the horn chirps and the hazard/parking lights flash once that tire reaches Honda’s specified pressure. So you don’t need to keep pulling the inflator off to check a separate gauge mid-fill.
If a tire is significantly overinflated or underinflated to begin with, the system also flashes the hazards briefly on its own to flag it.
It’s a genuinely useful feature for exactly the kind of adjustment described above — dial in the standard pressure precisely, without a separate handheld gauge, and without guessing when to stop adding air.
Clearing the TPMS Light
Here’s something that trips people up: unlike several other Honda models (Civic, Accord), the Pilot doesn’t have a dedicated TPMS reset button in most generations.
That button gets referenced constantly in generic “how to reset your Honda’s TPMS” articles, but it doesn’t apply to the Pilot — the system here is built to self-correct rather than wait for a manual reset.
What actually clears the light on a Pilot:
- Inflate all four tires to the correct pressure first. This is the step that actually matters — the light won’t clear with anything below it if a tire is still off-spec.
- Drive normally for 15–20 minutes, ideally with some time above 30–45 mph. On most Pilot model years, the system is self-learning and the light turns off on its own once it confirms all tires are correct — no button press or menu action required.
- 2016 and up: a “TPMS Calibration” option is available under Settings → Vehicle Settings on the touchscreen/Driver Information Interface. Use it if the light hasn’t cleared after driving with correct pressure, though on these model years the system typically detects the fix automatically without needing that menu at all.
- 2023–2026 with Tire Fill Assist: the live psi readout while filling (see above) lets you confirm each tire is correct in real time, which usually means the light clears without any extra steps once you’re done.
If the light stays on well after all tires are confirmed at the correct pressure, that usually points to a genuinely faulty sensor rather than a calibration issue.
At that point, a dealer or tire shop with a TPMS scan tool is the fastest way to diagnose it. Your specific owner’s manual is also the most reliable source, since Honda’s exact wording on this has varied by production year even within the same generation.
What Wrong Tire Pressure Actually Costs You
- Harsher ride and less grip on loose surfaces — overinflation is its own problem: the tire gets stiffer and can’t flex to absorb bumps, so the ride feels rough, and on sand, gravel, or snow, a rock-hard tire has a smaller, harder contact patch that’s more prone to slipping instead of digging in for traction.
- Uneven, faster tread wear — underinflation wears the outer edges, overinflation wears the center strip, and either way you’re replacing tires sooner than you should.
- Worse fuel economy — underinflated tires create more rolling resistance, meaning the engine works harder to cover the same distance.
- Higher blowout risk — an underinflated tire flexes more than it’s built for, which builds up heat inside the tire and weakens its structure, especially at highway speed or while towing.
- Reduced wet-weather grip — an underinflated tire is slower to channel water out from under the tread, raising the risk of losing traction on a wet road.
Quick Tire Care Checklist
- Rotate every 5,000–7,000 miles (an easy interval to remember: line it up with oil changes) to even out wear between the front and rear.
- Balance the wheels roughly every 15,000 miles, or any time you notice a vibration at highway speed.
- Get an alignment check if the vehicle pulls to one side, or after hitting a significant pothole or curb.
- Rinse off brake dust and road grime periodically — left to build up for a long time, it can make the rubber more brittle.
Frequently Asked Questions
Conclusion
The Honda Pilot’s tire pressure has shifted with nearly every redesign, and for a decade it varied by wheel size within the same model year — so matching your exact year (and wheel size, where it applies) actually matters here, more than it does on a lot of vehicles.
Use the table above as your starting point, confirm it against your door placard, bump the pressure up when you’re towing or fully loaded, and check it monthly with a real gauge rather than waiting on the TPMS light.

a cat lover, Honda driver, automotive enthusiast, and occasional photographer.
Nurjati is a proud Honda SUV owner and passionate content creator dedicated to sharing expert insights about full-size family SUVs.
His first car in school was a Honda, and she’s been in love with the brand ever since. With over 10 years of experience as a journalist and automotive blogger, Nurjati is committed to keeping enthusiasts and buyers informed and inspired.